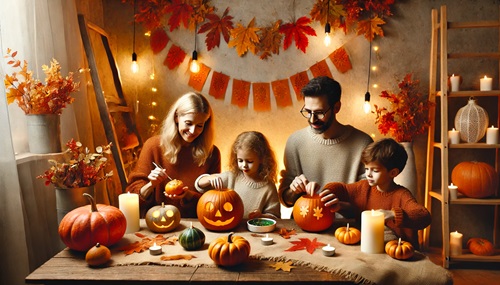
With Halloween right around the corner, it is time to take out your pumpkins, grab your kitchen knives, and get carving. Now, pumpkin decorating is a beloved tradition during Halloween, offering endless possibilities to express your creativity and a great chance to bond with your loved ones. Whether you’re looking to carve, paint, or embellish, we’ve got a variety of unique pumpkin decoration ideas that can help you turn your pumpkins into creative and festive masterpieces. So, what are you waiting for? Let’s dive straight into these fun pumpkin decoration ideas, which are perfect for both beginners and DIY pros and help you get that perfect Halloween decor.
Top 10 Pumpkin Decoration Ideas
Let’s look at some carved pumpkin ideas which can get you right into the festive spirit of Halloween.
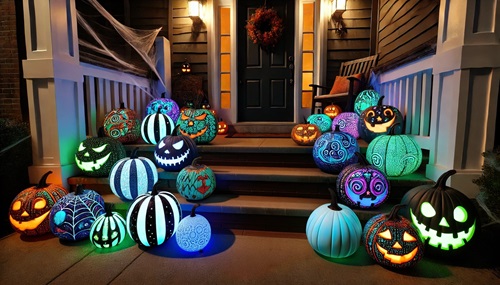
1. Glow-in-the-Dark Pumpkins
A vibrant glow-in-the-dark pumpkin, perfect for adding an eerie radiance to your Halloween decor.Light up your front porch at night with these terrific glowing pumpkins. Using glow-in-the-dark paints, create this out-of-the-world eerie and whimsical design that will help you light up your mood and Halloween. Whether you’re into spooky faces or complex designs, it’s time to get painting and add a distinct glow to your home.
Materials Needed:
- Glow-in-the-dark paint
- Paintbrushes
- Pumpkin (real or artificial, your choice)
Steps:
- Clean and dry the pumpkin.
- Using the glow paint, paint the design you want on the pumpkin.
- Let it dry and set it out at night for this magical glow effect!
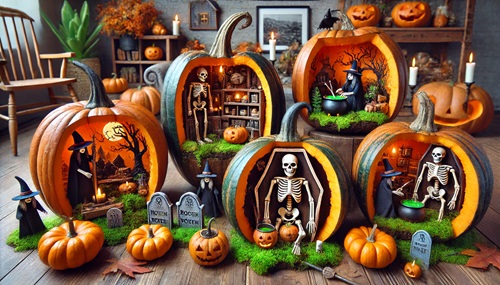
2. Pumpkin Dioramas
Intricate pumpkin dioramas showcasing tiny, enchanting scenes carved into the hollowed pumpkin.Cut out the insides of your pumpkin and turn it into a pumpkin diorama! Inside the hollow pumpkin, you can create small, spooky scenes, such as a haunted house, witches brewing potions, or tiny forests.
Materials Needed:
- Carving tools
- Figurines (miniature trees, houses, etc.)
- LED lights
Steps:
- Carve a huge hole on the side of your pumpkin.
- Remove the inside part and clean the seed and pulp.
- Put your figurines inside and try to create a beautiful scene.
- As a bonus tip, you can add LED lights for a glowing effect!
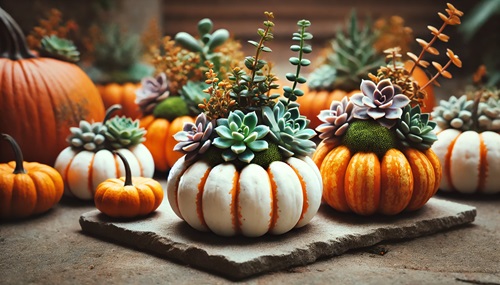
3. Succulent-Filled Pumpkins
A beautiful succulent arrangement nestled in a pumpkin, blending autumn charm with green elegance.Next on our list of pumpkin decoration ideas is succulent-filled pumpkins. Add some succulents to your pumpkins for a chic, nature-inspired look. This gorgeous, low-maintenance decoration will be perfect as a Halloween centerpiece but can be used as a fall decor piece long after. Sounds simple enough, right?
Materials Needed:
- Small pumpkin
- Succulents
- Floral foam or potting soil
Steps:
- Cut the top of the pumpkin and scoop it out.
- Install the floral foam or soil.
- You can arrange the succulents on the top by fixing them in the foam or soil.
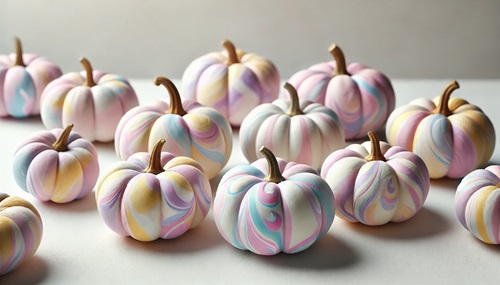
4. Marbled Painted Pumpkins
The marbled painted pumpkin featuring swirling colors, creating an elegant and modern twist on fall decor.Marbled paint is a great and trendy method for painting pumpkins. This fabulous technique combines different colors to create a wonderful effect of swirls, which looks really complicated but is surprisingly easy to achieve!
Materials Needed:
- Nail polish (various colors)
- A container of water
- Faux or real pumpkins
Steps:
- Fill a container with water and pour in various nail polish colors.
- Swirl the colors using a toothpick
- Submerge the pumpkin in that water and come out with a marbled design
- Let it dry, and enjoy your new artwork!
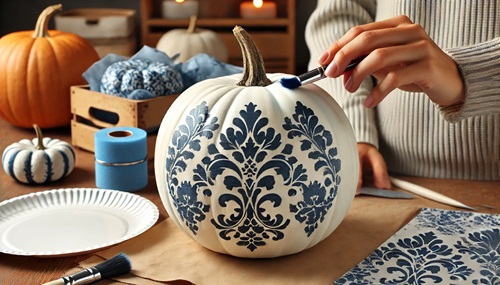
5. No-Carve Decoupage Pumpkins
A no-carve pumpkin decorated with colorful decoupage, adding an artistic touch to your autumn display.Are you not a fan of carving? Don’t worry; check out this idea, which doesn’t require you to use a knife. Simply glue on some patterned napkins or tissue paper for that vintage or quirky look. Easy peasy, no mess!
Materials Needed:
- Mod Podge or glue
- Napkins or tissue paper with designs
- Paintbrushes
Steps:
- Apply the Mod Podge on the surface of the pumpkin.
- Glue tissue paper or napkins on the pumpkin using the glue.
- Smoothen out wrinkles and cover the entire pumpkin.
- Let it dry to have a silky finish.
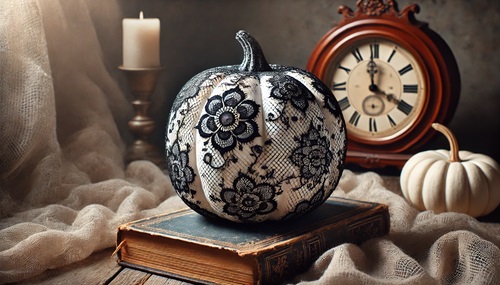
6. Lace-Wrapped Pumpkins
A pumpkin wrapped in delicate lace, offering a soft, vintage-inspired Halloween decoration.Lace-wrapped pumpkins are the best for achieving a Gothic feel yet an elegant way of making the pumpkin stylishly spooky. What one has to do is take black lace and lace it around a white pumpkin so that the pumpkin becomes stylishly spooky for Halloween night. The best part? You can use it as fall decor too!
Materials Needed:
- White pumpkin
- Black lace
- Hot glue gun
Steps:
- Cut a piece of lace to size according to the pumpkin.
- Place lace around the pumpkin with a hot glue gun.
- Optionally, add some bling to your lantern by adding some rhinestones for extra pizzazz.
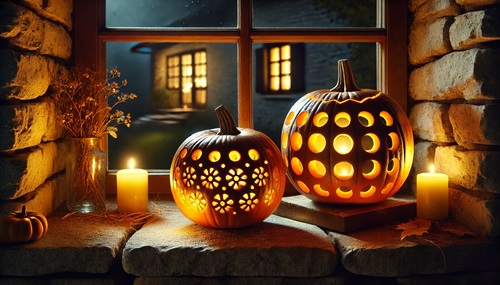
7. Carved Pumpkin Lanterns
Carved pumpkins transformed into lanterns, casting warm, flickering light for a cozy autumn evening.If you love traditional pumpkin carving and are good with a knife but want something a little different, turn that pumpkin into a lantern! Yes, we’re considering this idea to be our favorite addition to the list of carved pumpkin ideas. Instead of creating the more conventional jack-o’-lantern face, carve out complex patterns or geometric shapes that will beautifully let light shine through the holes.
Materials Needed:
- Stencils for designs
- LED candles
Steps:
- Draw your pattern onto the pumpkin using a stencil.
- Carefully carve out the design.
- Insert an LED candle inside to create an illumination
8. Pumpkin Topiary
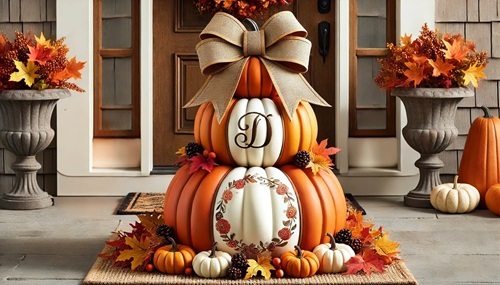
A stacked pumpkin topiary decorated with fall foliage and ribbon, creates an eye-catching seasonal display.Stack several pumpkins to make a pumpkin topiary that beautifies your garden’s entranceways. To obtain a more rustic impression, you can paint the pumpkins in different colors or leave them in their natural states. The finishing touches could be ribbons, leaves, or fairy lights.
Materials Needed:
- Three pumpkins of differing sizes
- Wood dowel or rod
- Paint (If you want)
- Decorative ribbon or leaves
Steps:
- Push the dowel down the center of the pumpkins to stack them.
- You can paint each pumpkin or leave them as is. (It is entirely up to you whether you want them natural or painted.)
- Add some ribbons, leaves, or fairy lights for a better appeal.
9. Spider Web Pumpkins
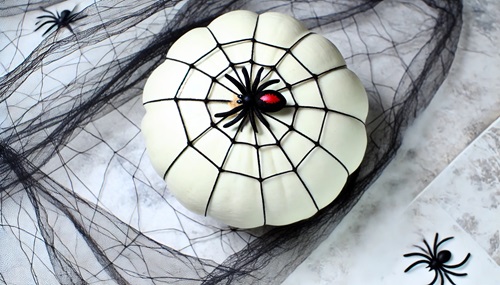
A pumpkin adorned with a spider web design made from black string, featuring a decorative spider for a spooky yet stylish touch.Create an eerie spider web with black yarn or string for your pumpkin. This no-carve design is pretty simple yet effective in bringing that spooky ambiance onto your decorations.
Materials Needed:
- Black yarn or string
- Plastic spiders
- Glue
Steps:
- Wrap black yarn around the pumpkin to give it a web-like pattern.
- Apply glue on it to make it durable
- Add plastic spiders to give an eerie feeling.
10. Candy Corn Painted Pumpkins
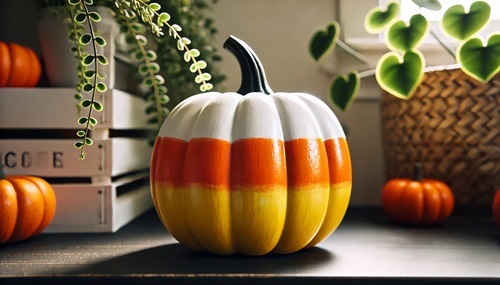
A pumpkin painted in candy corn colors—white, orange, and yellow—bringing festive fall vibes to your decor.Paint your pumpkin to look like candy corn for the perfect sweet and simple decoration. Using white, orange, and yellow paint, you can always give your pumpkin a bright and festive look to celebrate Halloween.
Materials Needed:
- White, orange, and yellow paint
- Paintbrushes
Steps:
- Paint the top third of the pumpkin white.
- Paint the middle section orange.
- Paint the bottom section yellow.
- Let it dry, and voilà! Candy corn!
There’s no better time than Halloween to let loose your creativity and have a little fun. Whether you’re a fan of some Halloween DIY or looking for carved pumpkin ideas, this list covers everything. From paints and succulents to glow-in-the-dark materials, there’s something for everyone. So, what are you waiting for? Get painting or carving and let your creations go viral on social media by sharing them with your friends and family. It’s time to stand out with your Halloween decor!
P.S. Can’t wait to hear which idea you liked best. Comment your favorite ideas or if you have any suggestions that should be added to the list!
Looking for amazing Halloween Dinner ideas? Check out this post to get creative with your dinner menu this Halloween.

